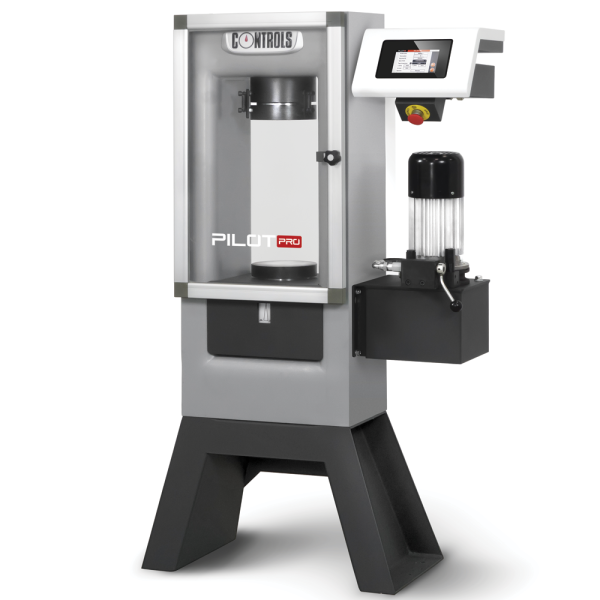
Technical Specifications
PILOT PRO AUTOMATIC POWER AND CONTROL SYSTEM
Hydraulics
- Dual-stage pump: centrifugal low pressure for fast approach automatically switches to radial multi-piston high pressure for loading
- DC motor, 720W, 50-60Hz
- Maximum working pressure 700 bar
- Load/unload valve
- Second/third frame selection valve available as option
Hardware
- 524,000 points high-resolution/stability analog channels
- 3 channels for load sensors
- Control frequency 250 Hz
- Sampling frequency 250 Hz
- 5.1”, 800 x 480 pixel, 16 M colors, icon-driven capacitive sensing touchscreen graphic display
- Unlimited storage capacity for test data on internal 16 GB SD card
- USB port for test data storage on external USB memory stick and for firmware upgrade
- Ethernet port for PC / Internet /network communication
- Optional integrated graphic printer including Load-Time plot
- RS 232 port for data downloading in ASCII format
Firmware
- Execution of compression, flexure, indirect tensile, ACV tests in automatic mode with load rate controlled by a closed-loop P.I.D. system
- Execution of loading ramps with the possibility to manually increase or decrease the test speed during the test
- Pause command to maintain steady load can be enabled at a pre-set value before the test or as required while testing
- Simultaneous display of load, specific load, actual load rate, load/time graph
- Saving of the specimen failure type (to EN or ASTM) in the test results
- Download data to internal printer (optional) or to PC via RS 232 port or to USB memory stick
- PC / network communication via Ethernet
- Multi-coefficient linearization of the calibration curve for better accuracy at low loads thus avoiding the use of a second pressure transducer
- Recording facility for up to 9 test profiles for each channel including: type of test (e.g. compression, flexural, indirect tensile), specimen size and shape, load rate, test standard and other general information. Each one of the recorded test profiles can be recalled automatically to save time
- Improved PID algorithm and multi PID selection. Up to 3 different PID settings can be tuned for a variety of materials (e.g. cylinder with neoprene pads, low strength specimens) and test methods (e.g ACV, flexure, indirect tensile).
- Compatible with the newly released Datamanager software, tailored for construction material testing laboratories, for real-time data acquisition, display and management
- Peripheral devices integration with Link-LAB
- Automatic load measurement verification procedure, by connecting suitable load cells and our digital readout unit to PC
- Language selection (including Cyrillic and Chinese)
- Unit selection (kN, ton, lbf)
- USB port for firmware upgrade and safe backup of the original configuration data (PID, calibration, etc.), in case of loss and/or data corruption. The restore of the machine to the factory settings is easy avoiding the need of any technical support.
PHYSICAL SPECIFICATION TABLE
| Model 50- |
A12P02 (A12P12*)
A12P04 (A12P14*) |
A42P02 (A42P12*)
A42P04 (A42P14*) |
A52P02 (A52P12*)
A52P04 (A52P14**) |
| Capacity kN (lbf) |
1500, (330,000) |
2000, (450,000) |
3000, (660,000) |
| Max vertical daylight, mm (inches) |
375 (14.7") |
375 (14.7") |
375 (14.7") |
| Horizontal daylight, mm (inches) |
265 (10.4”) |
350 (13.8”) |
370 (14.6”) |
| Max. piston travel**, mm (inches) |
50 (2") |
50 (2") |
50 (2") |
| Upper platen dimensions, mm (inches) |
dia.165x30 (6.5"x1.2") |
dia.165x30 (6.5"x1.2") |
dia.165x30 (6.5"x1.2") |
|
Lower platen dimensions,
mm (inches)
|
dia. 250x30
(9.8"x1.2")
|
dia.300x50
(11.8"x2")***
|
dia.300x50
(11.8"x2")***
|
| Platen surface hardness |
55.5 HRC (600 HV) |
55.5 HRC (600 HV) |
55.5 HRC (600 HV) |
| Platens flatness toll, mm (inches) |
0.02 (0.0008") |
0.02 (0.0008") |
0.02 (0.0008") |
| Overall dimensions, mm |
760 x 370 x 1085
(30" x 14.6" x 42.7") |
930x420x1530
(36.6" x 16.5" x 60.2") |
1020x475x1550
(40.16" x 18.7" x 61") |
| Weight approx., kg |
290 |
740 |
1105 |
* These machines are calibrated in lbf unit.
**Use distance pieces conforming to the specimen size to avoid piston overtravel
*** With threaded centering hole to be used with distance pieces with threaded pin


